
In 2016, the International Year of Pulses, we’ll be writing a lot about pulses (dried beans and peas), and we’ll also tackle the huge and diverse legume family more broadly. This weekend Katherine kicks things off with February’s Botany Lab of the Month: beans and chickpeas for your Superbowl bean dip and hummus.
The species name of Cicer arietinum means “ram’s head.”
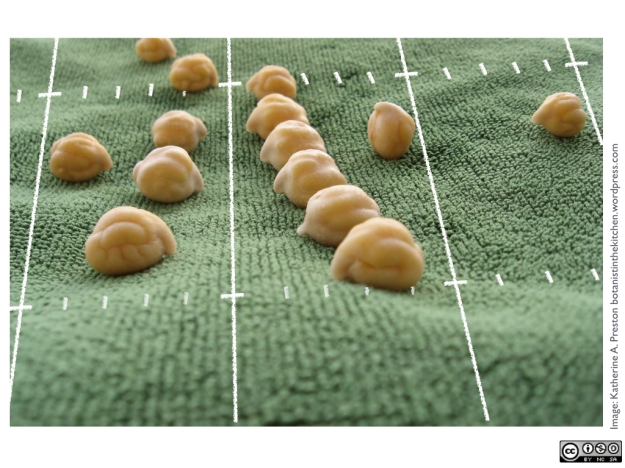
Beans are a bit like football: a boring and homogeneous mass of protein, unless you know where to look and what to look for. In this lab, we’ll make the smashing of beans into bean dip or hummus much more interesting by taking a close look at some whole beans before you reduce them to paste. The directions are very detailed, but this whole lab can be completed in the time it takes to explain the onside kick.
Of course, if you have only pre-mashed refried beans in your pantry, it’s too late. Then again, if you are using canned refried beans for your recipe, you are probably not living in the moment or sweating the details right now. That’s OK. Go watch the game and let us know when someone scores.
1. For this Botany Lab of the Month, you can start with soaked dried beans, home cooked beans, or even whole canned beans if that’s what you’ve got. Uncooked soaked dried beans are definitely the best choice. You can even set a few aside and watch them become seedlings.
2. The first thing to consider about beans is that they are seeds and thus came out of a fruit – in this case a legume “pod.” Bean-dip beans (Phaseolus vulgaris, e.g. white, kidney, pinto, black) develop within a regular edible green bean and are harvested when the pod is fully mature. Chickpeas (Cicer arietinum = garbanzo beans) come in small inedible hairy pods that resemble one-seeded edamame or peanut shells. Each individual seed is tightly enclosed by a seed coat (the testa), which often slides off when beans are soaked or cooked.
Close up of Phaseolus beans showing parts we often overlook. Click to enlarge.

The same image, with parts labeled. Click to enlarge.
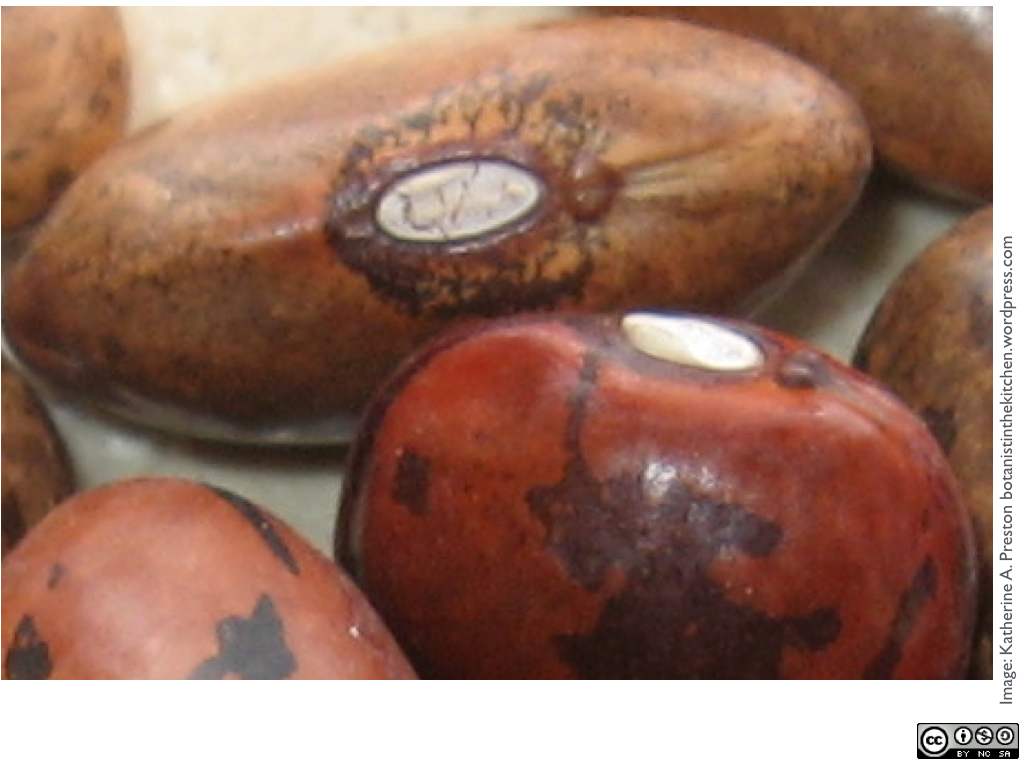
3. Look for evidence of the fruit connection right on the outside of the bean seed. Before harvest, a bean seed is attached to the inside of its fruit by a short little stalk (funiculus, or “slender rope”) through which it draws water, sugar, and nutrients. The same word is used for our umbilical cord (funiculus umbilicalis). Once the bean seed is mature, it becomes dry and separates from the fruit wall, but it carries a pale scar like a belly-button where its funiculus was attached. That scar is called a hilum, and it’s an obvious feature. In black-eyed peas, for example, the hilum stands out as a white scar in the middle of a black splotch. On the chickpea, the hilum is surrounded by a ridge so that it looks like one giant nostril under a beaky nose. Fun fact: Cam Newton won the Hilum Trophy in 2010.

Close up view of a chickpea flashing its hilum. Click to enlarge.
4. Several very interesting anatomical features appear when you look even more closely at a bean seed’s parts. On an ordinary Phaseolus type bean, the hilum sits in the center of the curved side of the seed. Extending from one end of the hilum is a narrow ridge, which may be easiest to see from the side. That ridge is the embryonic plant’s root (called a radicle) pressing out against the seed coat like overly tight clothing. When the seed germinates, the radicle will emerge from the seed coat, grow downward to anchor the seedling, and start drawing up water for rapid growth. The radicle of the chickpea is extremely obvious: it’s in the beaky nose of the seed overhanging the hilum.
5. Between the hilum and the radicle ridge is a tiny structure you may not be able to see: the micropyle (“tiny hole”). That’s where a pollen tube entered the seed (at that point still an “ovule”) and deposited its sperm. It may also be an entry point for water in some plant species, kicking off the process of germination. Finally, radicles generally emerge through the seed coat by way of the micropyle, which is usually found near the radicle tip. So if you can find the radicle in a seed, it will often guide you to the elusive micropyle. The micropyle is much more easily seen on Phaseolus beans than on chickpeas.
6. On the opposite side of the bean hilum is a pair of bumps called the strophiole. Allegedly, its Latin roots mean “little wreath,” which suggests that whoever named this structure was looking at some other species, and definitely not beans. Anyhow, in beans, there is some evidence that water enters the seed through the strophiole as well as through the micropyle (Smykal et al 2014).
7. Finally, running between the strophiole and the end of the seed is an elongated pleat or groove called the raphe. The raphe is a mark in the seed coat showing where, during development, the seed rested up against its funiculus (that umbilical-cord-like structure).
8. Oddly enough, the rest of the bean seed is much simpler than its outside. To get inside, first pull off the testa (seed coat). By the way, some hummus recipes suggest that you strip all your chickpeas of their coats (chefs usually call them hulls or skins) to make an elegant spread. If you mash by hand, it is nice not to have those tough testas scattered around in the hummus. If you plan to puree your beans or chickpeas, then it’s probably not worth the trouble.
9. Without the seed coat, you have a naked embryo. The radicle should be obvious now as a short thick curved root lying right where you expect it. On a chickpea, it’s in the nose. On a Phaseolus bean it runs halfway along the inside of the curve.
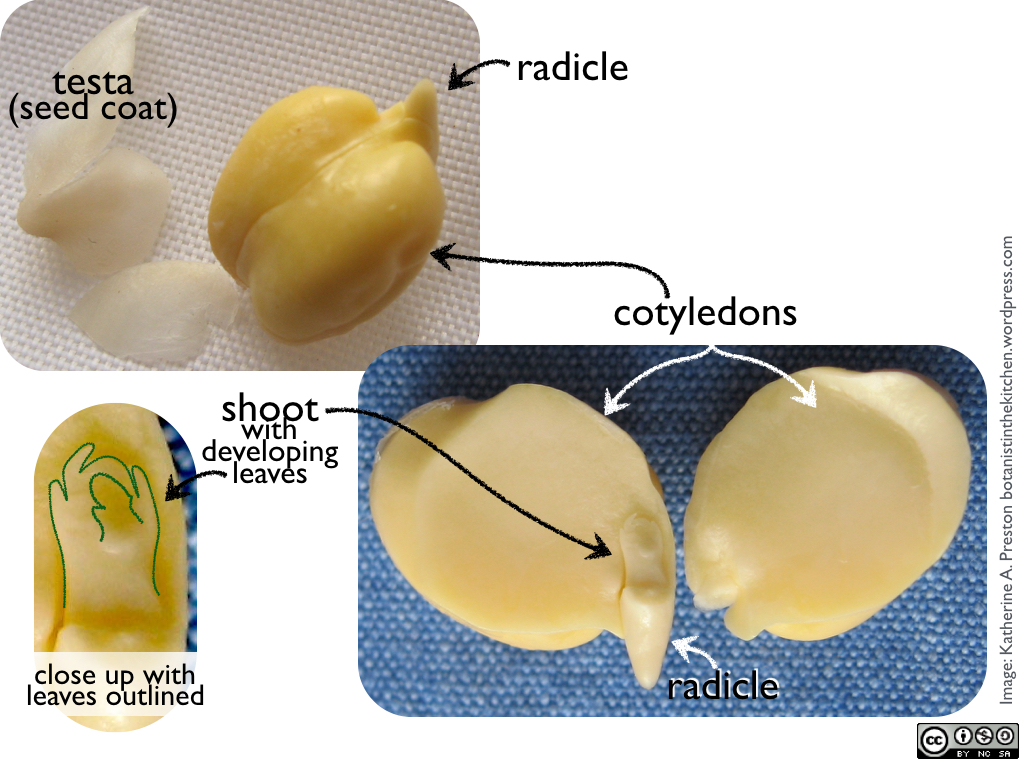
Chickpea embryo, with close-up showing the shoot tip (plumule) and its young leaves. Click to enlarge.
10. Now separate the two large lobes making up the bulk of the embryo. They are smooth in a bean and a little dimply in a chickpea. Those halves are the cotyledons, which store resources for the developing seedling. In beans, they are drawn out of the seed coat and carried above ground by part of the stem (the hypocotyl), where they become the first photosynthetic green leaves. In chickpea, they stay below ground while the rest of the seedling draws upon their stores for growth.
11. When you spread the cotyledons you will break one of them off, but you will still see that they were attached to each other near the top of the radicle and below a tiny little tuft of new leaves. The radicle grows out to become a root, and the tuft, or plumule, grows out to become the shoot.
12. Extra credit: If you do have soaked but uncooked beans, spread them in a shallow dish on wet paper towels to sprout. The seeds should not be submerged, but the water should pool around them on the paper towel. Keep the dish lightly covered (with a translucent plastic container lid, for example) and don’t let the seeds dry out. Change the water once a day so it doesn’t start to smell funny. You will see the root emerge first, followed by the shoot, which will turn green in the light, straighten up, and unfurl its young leaves.
From here you can continue with your favorite bean dip or hummus recipe or you can just go back to the game. I myself am a baseball fan, counting the days until spring training. Keep your eyes out for a peanut post.
Reference:
Smýkal, P., Vernoud, V., Blair, M. W., Soukup, A., & Thompson, R. D. (2014). The role of the testa during development and in establishment of dormancy of the legume seed. Frontiers in Plant Science, 5, 351. http://doi.org/10.3389/fpls.2014.00351
Shout out to my friend and partner in teaching 3 long lab sections in a day, Kay H, who taught me just how funny beans can be.

Aww, I think I know the Kay H! Love your blogs!
LikeLike
Thanks! I miss those days, especially the Long Islands and popcorn at Bear’s. Don’t forget to keep your pig stickers clean.
LikeLike
Very interesting post. Now, I really want to sprout some beans to see those tiny green leaves emerge.
LikeLike
Pingback: Ceanothus integerrimus | Find Me A Cure
Pingback: Buy me some peanuts! | The Botanist in the Kitchen
Pingback: Closing out the International Year of Pulses with Wishes for Whirled Peas (and a tour of edible legume diversity) | The Botanist in the Kitchen